Showing posts with label Utility Knife. Show all posts

Wednesday, 25 July 2012

My Mum's Strawberry Jam


I just love using my Granny's old brass jam pan when I make jams and chutneys - there is nothing quite like it! It's over 100 years old and will have seen some concoctions in it's time. Here's my favourite recipe for Strawberry Jam.


Ingredients

2lbs strawberries - slightly underripe is fine
1 1/2lbs preserving sugar
Juice of 2 large lemons
Knob of butter
(Liquid pectin if you feel the need)

Method

  • Wipe and hull strawberries using the Core 'n More.
  • Cut the strawberries on the Cutting Board using the Utility Knife and layer with sugar in jam pan.
  • Squeeze juice using the Citrus Press and add lemon juice.
  • Cover with tea towel and leave overnight so sugar draws the juice from the fruit and dissolves.
  • Next day, slowly heat until sugar fully dissolves.
  • Add a knob of butter as this will disperse some of the scum.
  • Bring to rolling boil for 5 - 10 minutes or until, when tested on a cold saucer, the jam wrinkles.
  • Skim off the scum if necessary.
  • If you need to add additional pectin, remove from heat for a few minutes and stir in prescribed quantity.
  • Let stand for 15 minutes so the fruit doesn't sink when you bottle it.
  • Whilst the jam is standing, heat the clean jars in the oven to sterilise them.
  • Ladle the hot jam into the hot jars. (Using a jam funnel makes transferring the hot jam safer and cleaner!)
  • Top the jam with a waxed disc (you can dip it in brandy first if you feel the need - personally I would drink the brandy and just use the wax disc, but each to their own!!!)
  • Put the lid on and leave to cool - the shelf life is 2 years but I bet it doesn't stay there that long.....

Thursday, 22 March 2012

Mother Knows Best!

Granny's jam pan!
When I was a little girl I used to pretend to be on TV presenting a cooking programme!  Strange how things turn out as, ironically, that's just what I do for a living - although not on TV.....  I would sit at the kitchen table and "present" to my mum whilst she prepared dinner.  Whilst she said she was a "boring" cook I would redefine that to be a "plain" cook.  A skill in itself is to be able to assemble a tasty meal from - what appear to be - bits of this and that left in the larder. 

I enjoy cooking with my kids and hope that I can pass on some of my Granny's wisdom and that of my mum.  In fact, only today I was looking for a recipe when I came across an old recipe collection - I had forgotten it was there.  To my delight on the inside cover my mother's name before she married and a wide selection of recipes ranging from war-time favourites including Mock Cream and Apple Dumplings through to more modern additions of how to cook spaghetti!

Lists of the amounts of sugar required for jam making and sauces traditionally served with meats alongside meats and poutlry in season, including Hare, Partridge, Grouse and English Plover.  Fantastic!

Inspired by my memories of my childhood and mums kitchen I made marmalade!

Beautiful, sunny, happy day - I love days like this...

Sheila's Saville Orange Marmalade

Seville oranges as required. 12 is a good number and makes about 10lbs when finished.
To each pound of fruit allow 2 pints water.  Weigh again when cooked and cut up and allow 1 lb of sugar to 1lb  of fruit and water.

Method:

  • Wipe and weigh oranges.
  • Put them into a preserving pan with the water.
  • Cover the fruit with a large place, to keep them under the water and boil them for 11/2 hours.
  • Leave until next day in the water then remove oranges from liquid.
  • Cut into quarters, scrape out the pulp, soft pith and rub through a sieve.
  • Boil pips in a saucepan with 1 pint water until reduced to about half.  Add to this whatever pulp is left after rubbing through the sieve.
  • Strain it off and add to the water in which the oranges were boiled.
  • Add sieved pulp and peel cut into thin strips.
  • Weigh and add sugar and cook slowly until dissolved, then bring to a rolling boil.
  • Boil until it will jelly when cold, keeping it stirred and when nearly ready remove any scum that may be on top.

Tip:  An easy way is to weigh preserving pan or bowl and weigh liquid in it, then add sugar accordingly.

Carol's version:

Method:


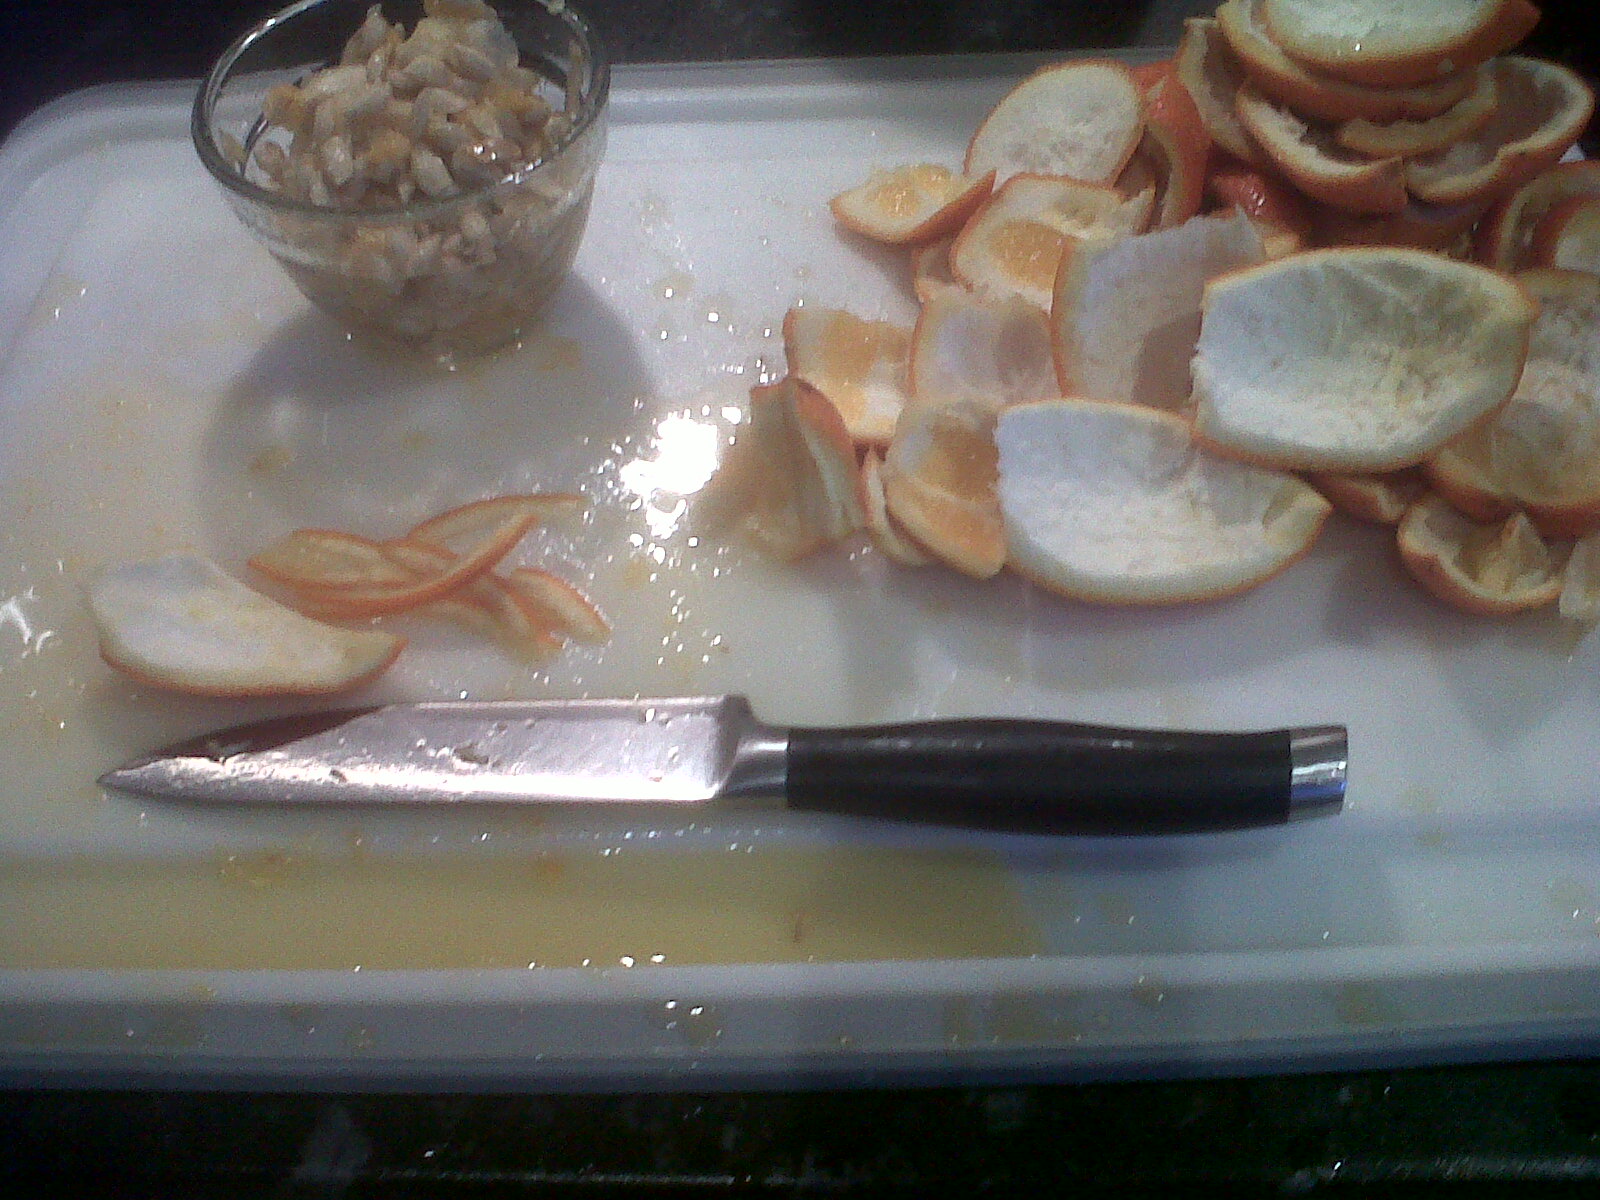
  • On Large Grooved Cutting Board, quarter oranges using Utility Knife, remove fruit pulp and chop. 
  • Place skins to one side.
  • Put pulp in bowl and seperate out pips - place pips in Small Batter Bowl.
  • Take half the skins and cut into thin strips - add to fruit pulp.
  • Cover pips with water.  Leave everything overnight.
  • Weigh fruit and allow 2 pints of water per 1 lb of fruit. Add 1 lb sugar per 1 lb fruit.
  • Strain pips and gather all jelly and strained liquid - use this in your liquid allowance.
  • Put fruit, sugar and liquid into preserving pan.
  • Add juice of 2 lemons.
  • Bring to boil, stirring and then allow to bubble well (rolling boil)

Tip:

Push the cooled liquid with your finger and it should wrinkle
  • To test if setting point has been reached, chill a plate in the fridge or freezer, drop a small amount of liquid on it and when cold push the liquid with your finger - if it wrinkles then it is ready, if not boil for longer!
Hot liquid = hot jars!
  • Warm jars in oven and then ladle warm marmalade in - if you use a jam funnel it makes it easier.


Tuesday, 13 March 2012

Week 2 - weigh in, or weigh out?!

This week has been an adventure - I have been on a roller-coaster ride with work - Express Cooking Demo at the weekend as part of a Roadshow (I was so nervous and wanted it to be so right!)  Life - how was I going to create extra hours in the day to fit everything in!  Kids - activities, activities, activities..... and the thing that suffers is my food.  I don't know about you, but I go into reactive, snatch and grab mode!   I guess it's what we all do all the time.

Instead of the lovely healthy food I enjoy when I'm on the run I grab the first thing that comes to hand - crisps, cake, pasties .... and go .... not a good week although it only started to go wrong on Friday, then continued on Saturday and by Sunday, well I had given up and enjoyed some chocolate too!

So with a plan formulating I stepped on the scales in fear of putting all that "butter" back on.  To my delight that hadn't happened so, joy in my heart, I skipped back to the fridge for a no fat yogurt to celebrate!

What's your top tip for healthy food on the go?

Here's a really tasty and quick stir-fry supper dish.


Chilli Beef Noodles

Serves: 4

For Slimming World followers there are these Syns per serving:
Extra EasyFREE greenFREE* (*Add 6 Syns if not using steak as a Healthy Extra)

ingredients

  • 12oz/340g sirloin steak, all visible fat removed
  • 1 tbsp soy sauce
  • ½ tsp crushed dried chillies
  • ½ red, yellow and green pepper
  • 1 carrot
  • 300g pack dried egg noodles

method

  1. Prepare the stir-fry ingredients: on the Cutting Board cut the steak into strips using the Utility Knife, place in a Classic Batter Bowl with the soy sauce and crushed chillies and marinate in the fridge for at least 10 minutes
  2. Slice the peppers and carrot; cook the noodles according to packet instructions, drain and set aside.
  3. Heat the Stir-fry Skillet and stir-fry in soy sauce and chillies for 2-3 minutes. Add the peppers and carrot and continue frying until softened. Add the noodles, heat through and serve.
Tip: You can replace the steak with the same weight of pork without changing the Syns on any choice.

This recipe is not suitable for home freezing.

Monday, 12 March 2012

Pampered Chef Spring Roadshow 2012


Terrified!  Why, when I've done almost 600 Cooking Shows during the past 8 years, was doing a demo infront of 150 of my peers different? Well, that's just it isn't it?  All 150 of them know what I should be doing so I have to do it well - no, just good isn't good enought for me, nothing less than brilliant would do!

Introduction, recipe and wrap-up in 30 minutes - ok that's do-able; pushing it - but do-able!  Recipe choice, hmmm a tricky one;  no cooking facilities and ingredients need to survive in a cooler bag for most of the day and still look presenatable (thank goodness it's not likely to be eaten after that amount of time out of the fridge!)

In a flash of culinary inspiration - no-cook pizza sprang to mind!  Easy... cook base in advance - chop, assemble and grate it's done (that is meant to be grate - as in cheese) but, even if I say so myself, it was a  great success!!!! 

A good old Pampered Chef favourite fitted the bill - chilled fresh croissant dough forms a crust and bakes to perfection with Athenian style toppings adding a cool twist to this tasty appetizer - perfect!

Cool Athenian Wedges
  • 1 packet (240 g) chilled fresh ready to bake dough for six croissants
  • 1 packet (200 g) full fat soft cheese, softened
  • 1½ tsp mayonnaise
  • 2 tbsp green or Italian basil pesto
  • 1 clove garlic, pressed
  • 4 sundried tomatoes, drained and finely chopped
  • 4 tbsp chopped green pepper
  • 50 g/1 ¾ oz pitted black olives, sliced
  • 25 g/1 oz fresh Parmesan cheese, grated
  • 2 tbsp fresh parsley or basil leaves, minced

1.      Preheat oven to 200°C/400°F/Gas 6. Unroll croissant dough and divide into triangles. Arrange triangles in a circle on Medium Round Stone with narrow ends toward centre. Using lightly floured Baker’s Roller, roll dough to form 30 cm/12-in circle; press to seal perforations. Bake 12-15 minutes or until light golden brown. Cool completely.

2.      In Classic Batter Bowl, combine soft cheese, mayonnaise, pesto and garlic pressed with Garlic Press; mix well.  Spread soft cheese mixture evenly over top of crust. Finely chop sundried tomatoes using Utility Knife. Chop green pepper using Food Chopper. Slice black olives with Egg Slicer Plus.

3.       Sprinkle tomatoes, green pepper and olives over soft cheese mixture. Grate cheese over top using Fine Microplane Grater. Mince parsley using Manual Food Processor or Crinkle Cutter. Sprinkle over top. Cut into wedges using Pizza Cutter; serve using Mini-ServingSpatula.

Serves 4 as a meal
Serves 8 as an appetizer
Serves 20 as a canape

  .


Sunday, 11 March 2012

Berry hearts


Sunday afternoons are meant to be lazy, leisurely events... A cup of tea in the sunshine and these attractive - and very simple to make -  Berry Hearts make me think of long summer days and the delicious juicy fresh flavours that are so abundant!  Once again this recipe is from Debbie at Slimming World and is absolutely scrummy!


Serves: 4

Syns per serving:   5.5 Syns on Extra Easy, Green or Red

Ingredients 

100g/3½oz puff pastry
100g/3½oz fat free natural fromage frais
57g/2oz quark
2 tbsp artificial sweetener
a few drops of rose water
340g/12oz mixed berries
icing sugar to dust

  • Preheat the oven to 220°C/425°F/Gas 7. 
  • Divide the pastry into 4 equal portions and using the Baker's Roller, roll each one to make a 4-5in square. 
  • Cut a heart shape from each pastry square and place on a Rectangle Stone.
  • With a sharp Utility Knife score a border, about  ¼ - ½ inch from the edge of each heart. 
  • Bake in the oven for 12-15 minutes until the pastry has risen and is slightly golden. 
  • Remove from the oven and place on the Stackable Cooling Rack to cool, push down the centres of the hearts gently to make a case for the filling.
  • Place fromage frais, quark and sweetener into Classic Batter Bowl and using the Double Balloon Whisk beat them together.
  • Measure the Rose Water using the Adjustable Measuring Spoons and add to fromage frais mixture.
  • Using the Easy Accent Decorator pipe mixture onto the bases of each heart. 
  • Top with the berries and serve dusted with a little icing sugar (use the Flour/Sugar Shaker to do this for ease).
Chef's tip: Prepare the pastry case and the creamy filling in advance, and then assemble when you are ready to serve.

Thursday, 1 March 2012

Molten Camembert Muffins

I love the idea of warm muffins for breakfast and these savoury treats tick all the boxes for me!


MOLTEN CAMEMBERT MUFFINS (March 1 2012)

3 tablespoons sunflower oil, plus extra for greasing
1 round (250 g) ripe Camembert cheese (about 10–11 cm in diameter)
250 g plain flour
60 g wheatgerm
65 g Parmigiano Reggiano cheese, finely grated
5 tablespoons snipped fresh chives, divided
2 teaspoons baking powder
1 teaspoon bicarbonate of soda
¼ teaspoon salt
1 pot (284 ml) buttermilk
2 eggs
1 tablespoon milk
20 g walnut pieces, coarsely chopped

Method:
ð Preheat oven to 180ºC/fan 160ºC/Gas 4.
ð Brush wells of Muffin Pan or Stoneware 12 Cup Muffin Pan with sunflower oil using Chef’s Silicone Basting Brush; set aside.
ð Cut rind off sides only of Camembert cheese using Utility Knife (leave rind on top and bottom of cheese); discard rind.
ð Cut trimmed cheese into twelve 2-cm cubes; set aside. Save remaining cheese for another use.
ð Combine flour, wheatgerm, Parmigiano Reggiano cheese, 4 tablespoons of the snipped chives, the baking powder, bicarbonate of soda and salt in Stainless 4-Litre Mixing Bowl; mix well.
ð In Small Batter Bowl, combine buttermilk, eggs, milk and remaining 3 tablespoons sunflower oil; whisk together well using Stainless Whisk.
ð Stir buttermilk mixture into flour mixture using Small Mix ‘N Scraper®, using as few strokes as possible until just combined. (Mixture will have a slightly lumpy, wet appearance. Do not over-mix.)
ð Using Large Scoop, place one generous scoop of mixture into each well of prepared pan, dividing mixture evenly.
ð Gently press one cube of Camembert cheese into centre of each muffin. Using Small Spreader, spread mixture over cheese cube to cover; sprinkle with chopped walnuts.
ð Bake 15–20 minutes or until risen and firm to the touch.
ð Remove pan from oven to Stackable Cooling Rack; let stand 5 minutes.
ð Carefully remove muffins from pan; sprinkle with remaining snipped chives. Serve warm.

Alternative ideas:
Oak-smoked mature Cheddar cheese, extra mature Cheddar cheese or ripe Brie can be substituted for the Camembert, if desired. These muffins are best eaten warm on the day they are made.
Pampered Chef recipe (Spring/Summer 2012)